10 Tips for Using your Computer for Online Meetings and Teaching
During the “new normal” where we are all at home, we have to adapt to communicating from afar. It’s often using webcams and microphones in addition to a keyboard and mouse, and this can feel overwhelming at first.
Worry not, I‘ll share with you my tried-and-true tips for sharing your face and voice online–for both meetings and remote teaching scenarios.
In Video Chats and Meetings
I use Slack and Zoom every day; I have for over five years. And it’s a 50/50 mix of text conversations or video calls that include video and voice and/or screensharing.
1. Be Present, or begone
Maintain eye contact
The bottom line is you are either fully present, or you are not. Choose one and be clear with yourself, and others, about what you chose.
Video Chats = fully present
Text chats = partially present
Also, video chats are different than meetings. A chat is almost always about providing more clarity and moving something forward. Sadly, many meetings do not always live up to this goal and often serve to convey information at the speed of speech (which I find is dramatically slower than reading). On the upside, meetings can be used to solve problems in realtime.
Solution: Participate 100%. Look people in the eyes. Listen. Nod. Ask smart questions that move the conversation forward. Volunteer to take responsibility when appropriate.
Also consider: ask to opt-out of meetings that you can only half pay attention to. If not, force yourself to set aside those things on which you are trying to multitask.
The meetings will always conclude faster this way, and in a more satisfying manner.
2. Present Yourself Well
How you show up to a meeting is the first link in a chain of trust you build. Try any or all of the following:
dress appropriately
be in a clutter-free space (especially your background)
don’t slouch— sit up
Like it or not, people will judge you for how you look. Help them get past the surface details by being presentable.
3. Be seen and heard clearly
See end of post for links to products
This can be the most perplexing task for someone who is not already a photographer or content creator. But it’s vital that to the meeting that the other participants can both see and hear you.
It’s also, I might point out, equally unfair to all. I am speaking only to the people who are uncomfortable being on screen and might choose to hide behind an avatar instead of turning on their video feed.
Some simple ways to ensure you are respected and not distracting:
ensure you are brighter than the background with precise lighting choices
wear headphones (wired preferred, as their batteries never run out)
use an external microphone, placed as close to your mouth as possible/appropriate
use an external webcam–they are both higher quality than built-in ones and can be positioned at an ideal height at or above your eye-line
mute yourself unless speaking (and avoid embarrassing moments from unexpected background noises)
It’s commonly known among filmmakers that bad sound can ruin a good looking picture. If your sound is bad, people will strain to hear you and possibly ignore you or become distracted from the main focus of the meeting. So even an inexpensive wired lavalier microphone can make you sound like a rockstar.
4. Know your software
YouTube Studio - essential for me.
If you are using Zoom, go watch some videos and read the help docs about all the features. Same goes for Slack. Or Microsoft Teams. And YouTube Studio. Whatever software you are using, click on every menu item and button and learn what it does. You might be able to help someone else in your organization do something with your knowledge.
An example of this leads me to speaking about being an educator and…
Tips for Teaching Online
Right now we are all in mandated stay at home conditions. It won’t always be this way, but it’s an incredible time to become proficient at presenting ideas for recorded video, streaming, written and for designed pieces like infographics.
Ruling the roost is first-person teaching via streaming video. It’s immediate, interactive and pretty easy to execute on popular social media platforms.
I go live on-screen at least twice a week and helps other go live on a handful of days as a producer/director. At National Parks at Night, use a paid Zoom account to stream to our YouTube channel. At MAC Group, I livestream as a Producer on the PhotoVideoEDU, NanLite USA and Saramonic USA channels. And occasionally I log into my personal Instagram and stream making paper art on Instagram Live.
Me providing invisible support as a behind-the-scenes Producer via Zoom and YouTube
Only the latter is a solo effort. Every other one involves many people.
If I did not have to have another person on screen with me, it would be easy to skip Zoom and go straight to any platform. But let’s be honest–a dialogue is way more interesting than a monologue. Amirite?
5. Collaborate
Find someone to teach with and team up. You each have strengths that should compliment the other’s weaknesses.
For instance, our weekly livestream #BlogChat for National Parks at Night is one person interviewing the author of a recent blog post. It’s a conversation about a topic that was previously carefully researched and presented in written form.
A sample Livestream poster frame
I LOVE the conversations we have. They include expansion of ideas that may not have been covered int he blog post, second opinions and we reply to comments and questions from the Live Chat during the broadcast.
Without a second person, it’s boring and flat–I’ve tried it. Meh.
6. Stand up
I sit too much. So I invested in a standing desk. I also look better standing than sitting. And my diction is better because I am using my lungs at full capacity.
This works for meetings, too. Standing end faster than sitting meetings. You have a reason to be succinct!
Just try to avoid shifting side to side too much. That can be distracting to the viewer.
7. Fail fast and fail small then go bigger
Tech companies call this operating in “dark” or “stealth mode.” I suggest that you first prototype your ideas and present them quickly to small audiences. Then, after you learn all the stuff you didn’t know, ramp up the production and promotion of future events.
Some real-wold examples:
During an Instagram Live we had five griefers come in and ZoomBomb by taking over our comment stream with foul language and threats. We didn’t know some of the best practices like turning on comment moderation, pasting in a list of inappropriate words or more… Until the pain happened.
Or, posting a Zoom meeting link on social media and having more griefers come in and use the annotation tools to draw obscene things on the screen during a screenshare presentation. We could have avoided that in so many ways (the subject of another article, I am sure).
Suffice to say, testing small can help you avoid embarrassment. It’s impossible to know everything–that’s not what I am suggesting. Do your homework, but not so much you never get to presenting your ideas to real people. And learn from mistakes for future iterations.
8. Light yourself well
Here is a simple demonstration of how changing lighting changes perception.
Overhead lights = “raccoon eyes”
LED in a softbox
You do not need to go crazy. but you certainly trust the guy in the third photo more than the first, right?
And to be sure you are seeing the truth, please get a colorimeter and Profile and Calibrate your display(s). Knowing that you have proper brightness, contrast and color is the best place to start so you aren’t fooled into thinking what your monitor is showing is neutral or accurate (hint; it often is not). My favorite for years is the X-Rite i1Display Pro (link below).
9. Use a good microphone
Your laptop’s microphone is OK. But if you use that keyboard and trackpad to operate the computer, then it’s likely everyone can hear the clackity-clack of your keyboard. I use an external keyboard, but still I also use an external microphone.
Keeping the microphone apart from the keyboard is important if you operate your computer at all during a meeting.
In addition to that, it’s just physics–the closer the mic is to your mouth, the better it sounds.
One final note is your room treatment. Put some soft things in your room like a carpet, blankets, pillows and stuff. Anything to eat noise reflections off the wall. A blanket on the wall behind your laptop can really make you sound much better; the sound does not reflect right back into the mic.
10. Use wired headphones
Wired headphones do not run out of batteries.
Aesthetics aside, wired headphones serve two purposes:
Eliminate outside distractions while you are in a meeting or teaching
Prevent feedback from the microphone and speakers.
And it’s quite possible you will prevent misunderstandings caused by not hearing well from tinny laptop speakers.
If you choose to use Bluetooth headphones, charge them often.
Bonus: Take it slow
It took me five years to get to build up my space and gear.
I set aside a space dedicated to creative and educational activities. I invested in building it out (including lots of Rockwool insulation — good for heat AND sound).
And one piece at a time, I built out my ability to conduct livestreams and record online educational videos.
So don’t expect it to happen overnight. Get one thing at a time and see how it improves things. 1) Lights, 2) sound and 3) camera.
So… we did a livestream on this and here it is!
click for a larger view
NanLite Pavotube 15C and 30C (2' and 4' LED Tube Lights)
X-Rite i1 Photographer Kit (i1Display and ColorChecker Passport)
+++++++++++++++++++++++++++++++++++++++
Other interesting articles:
Everything I missed is in Seth Godin’s perfect blog post.
Adjust your Zoom security settings to avoid these 5 privacy issues by Zapier
NOTE: Some of the product links above are affiliate links. If you follow a link and purchase something, National Parks at Night may make a small percentage on that sale, at no additional cost to you.
+++++++++++++++++++++++++++++++++++++++
About Matt HIll
Matt leads (at least) three lives. As an artist, he makes cut paper art and night photography. For his vocation, he is a marketing professional working in the photo/video market for 25+ years, and at MAC Group for nearly 20 of those years. For passion, he is co-founder, partner and educator at National Parks at Night where he teaches night photography, authors blog posts and has amazing adventures with attendees.

National Parks at Night

Announcing: NATIONAL PARKS AT NIGHT!
I am so very delighted to share with you a dream that was almost two years in the making. Gabe and I have been talking about launching a program for night photography workshops in national parks, and now it's a reality.
There are five instructors: Gabriel Biderman, Lance Keimig, Tim Cooper, Chris Nicholson and myself. We are teaching one workshop only at each location. So please join us! In th meantime, here is a little story about how I fell in love with Arches National Park, and how NPAN was born:
I was on a road trip with my best friend and one of our stops was Moab and specifically Arches. I had, of course, seen the photos others had made. I had imagined the ones I could take. And I was excited.
We rolled in in late afternoon, checked in and drove straight into the park. It was sunset, and we wanted to see a few choice locations and scout for potential night photography.
At sunset, the red rocks glow; they almost vibrate with color. I was a passenger, and glad of it. My neck was whipping from side to side, and I was mentally noting every location I wanted to document by the light of the full moon later.
Did I mention it was January?
Having seen enough roadside attractions, we stopped at the base of the viewpoint for Delicate Arch. seeing it for the first time allowed for contemplation of scale. I knew that a person in juxtaposition to that stone semicircle was minuscule, and it looked small from the roadside. We decided to hike up in magic hour.
The snowy and icy approach was treacherous. But the opportunity to see Delicate Arch from above with daylight-bright moonlight behind it was magical. It was also quite cold, so we spent 1/2 hour up there making some long exposures – all the while mesmerized by the geological wonder in front of us.
Descending by flashlight and moonlight, we chatted excitedly about what we had seen, agreeing that more people should see it by moonlight. I filed that one away and immediately started thinking about bringing other lovers of night photography to Arches for a similar experience.
We did more roadside shooting that evening. The snow, moonlight and clear, bright skies erased any concerns I had for the cold weather. I was in the midst of being totally present in one of the most beautiful spaces I had ever seen.
We are only teaching at Arches National Park once. We hope you join us!
Woodlawn Cemetery Night Photography Workshop 2014
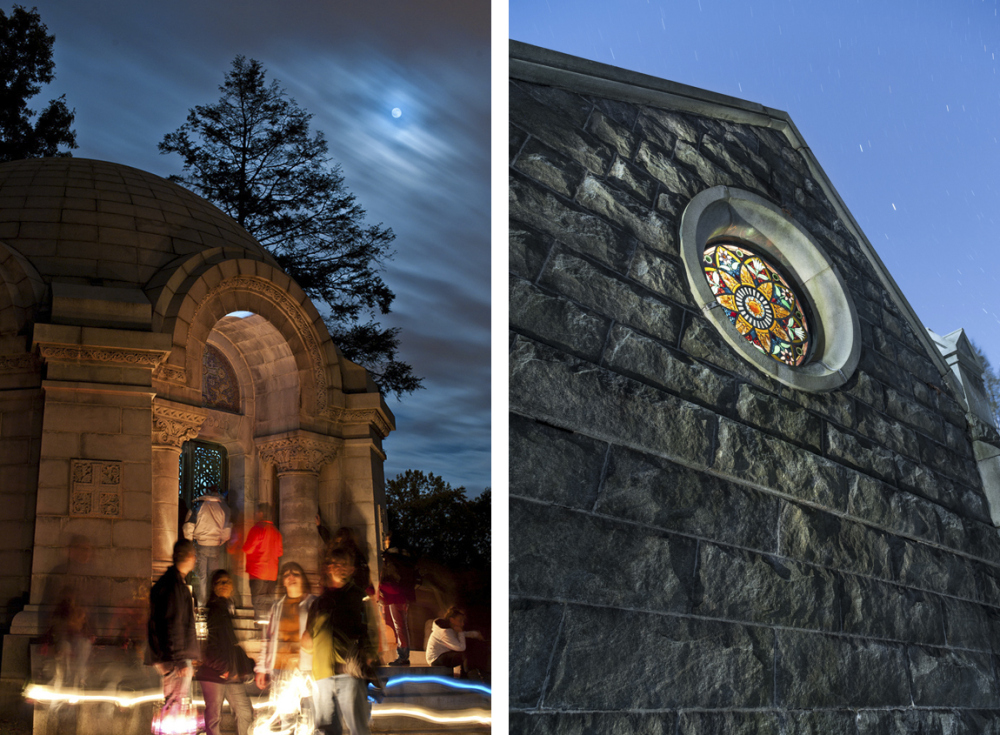
Woodlawn Cemetery is a 400-acre outdoor museum with an unrivaled collection of monuments, over 1300 significant mausoleums, which were designed by legendary architects, landscape designers, and sculptors. You will be transported in time as you walk the grounds and take in Art Nouveau, Egyptian, Greek, and Romanesque Revival architecture styles.
Since it’s inception in 1863, Woodlawn has become one of New York City’s irreplaceable treasures and was designated a National Historic Landmark in 2011.

And now you have an opportunity to capture this magnificent place at night. Matt Hill and I are offering a two-night workshop on November 14th-15th. There will be no moon while we are shooting, so this is a great workshop to hone your light painting skills. We will have access to go inside several grand mausoleums, illuminate beautiful stain glass, and get lots of hands on training from Matt and I.
You can choose to shoot just one night – or if you take both you will be able to get feedback on your work at the critique on Saturday. We also feel that by shooting on consecutive nights you will become more proficient with your night photography skills as well as explore more of this amazing location.
Tuition, per night: $150
REGISTER HERE
Date: Friday November 14th from 4pm-11pm and Saturday November 15th from 2pm – 11pm
Instructors: Gabriel Biderman and Matt Hill
Where: Woodlawn Cemetery, Jerome Avenue Entrance, Bronx, NY
Required Gear: (Film or Digital): camera, tripod, and cable release. A full gear guide will be sent to you upon registration.
The above photos were taken by Matt and Gabe from previous workshops at the Sleepy Hollow Cemetery.
The below images are examples from the Woodlawn Cemetery and taken by workshop coordinator Peter Nagy.


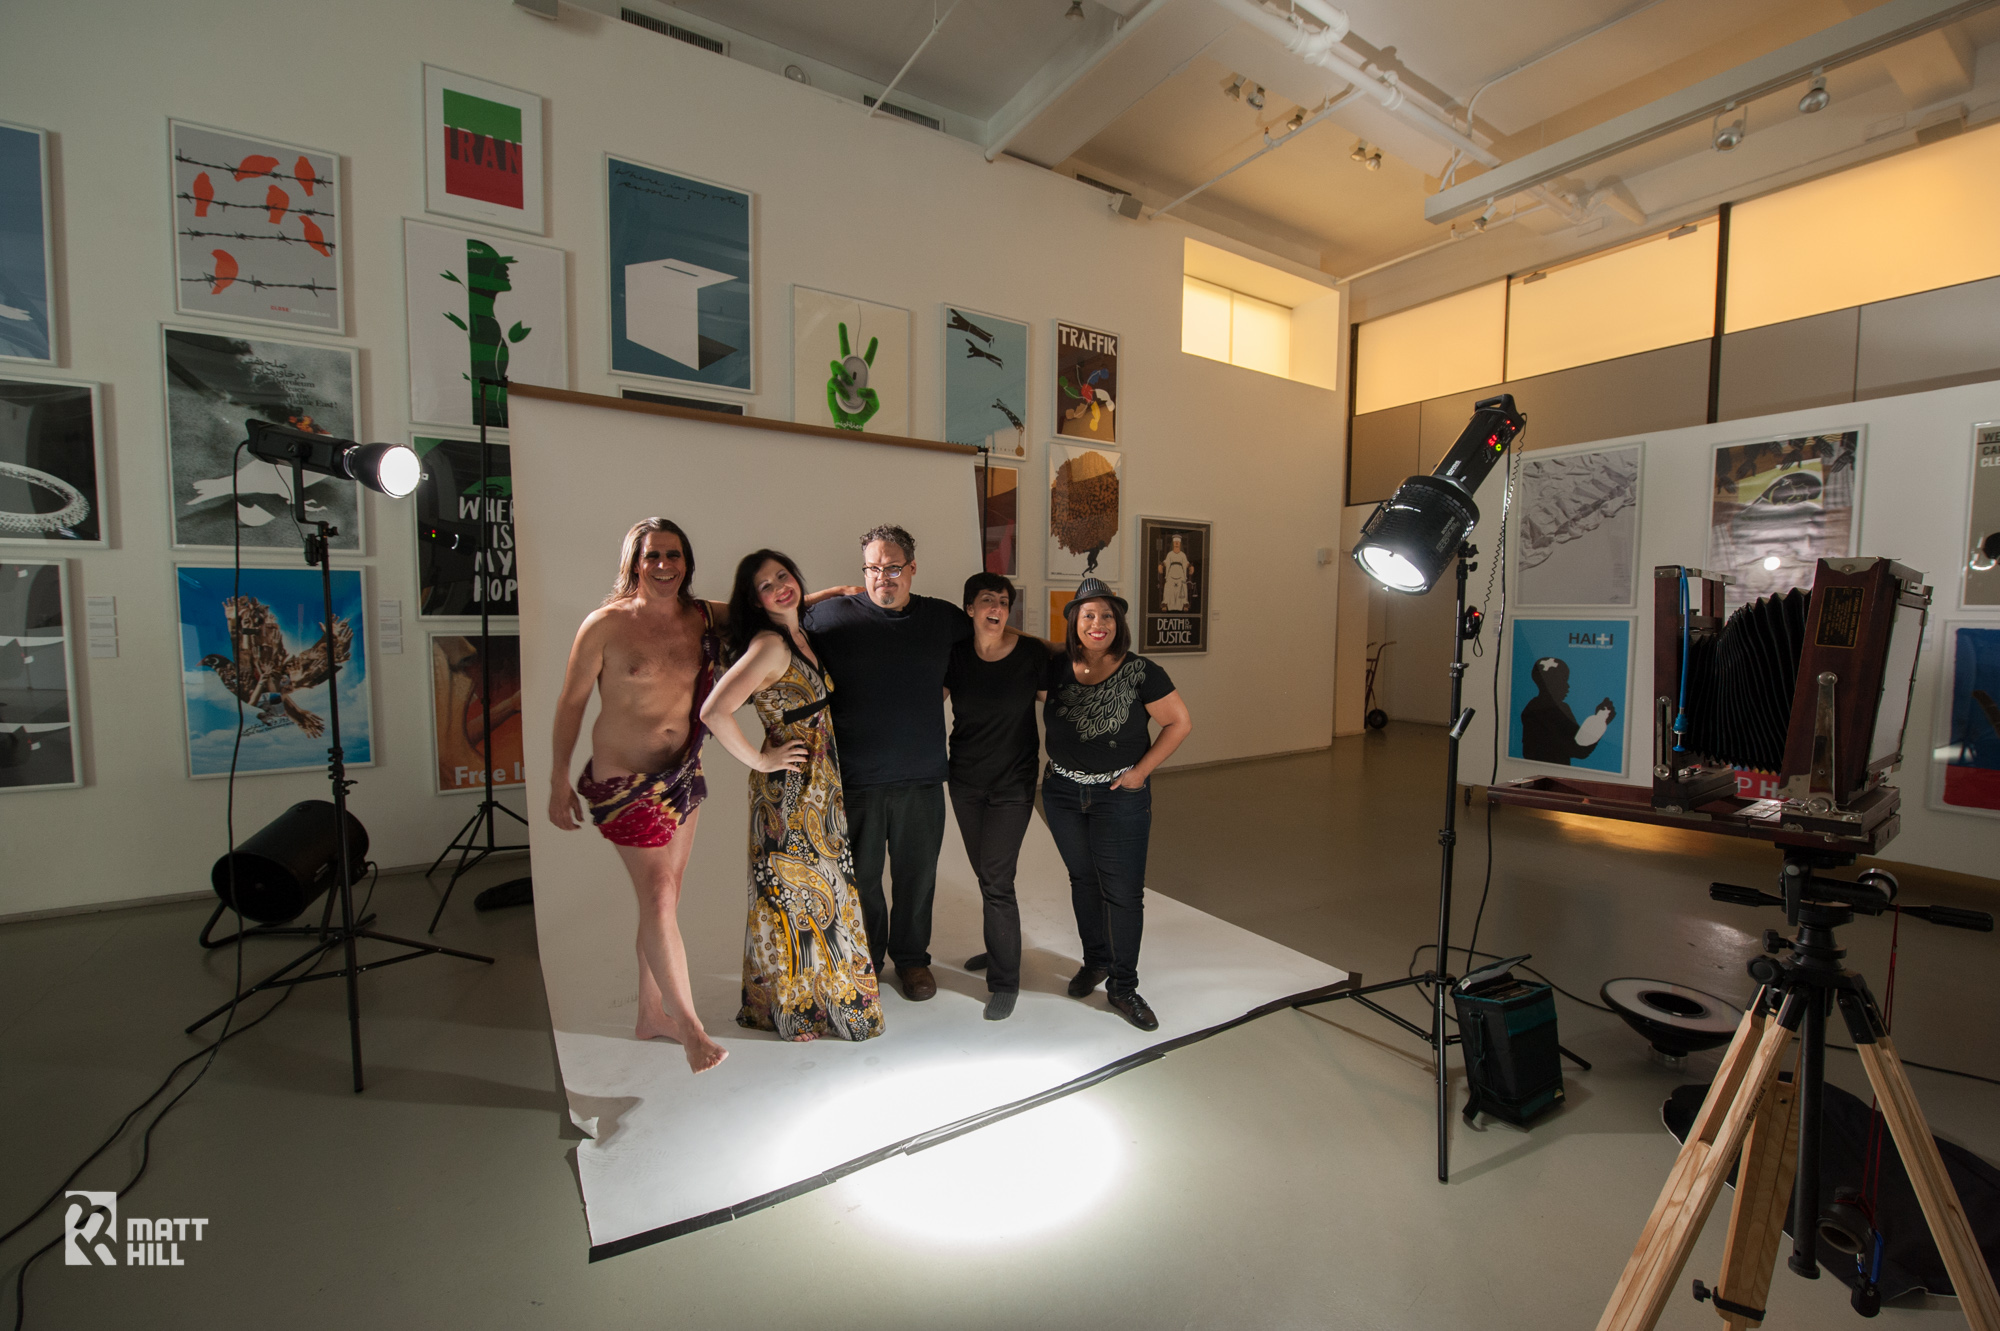
ADC School of Craft: Creating Mixed Media Masterpieces

I am late announcing this, but I am truly delighted to be featured among the first twelve Art Directors Club members to be featured in their new SCHOOL OF CRAFT created in conjunction with Skillfeed.
I spent a half day with the film crew from the ADC making an educational film titled, "Creating Mixed Media Masterpieces."
Course Description: Apply your creativity with someone else’s, and you will both do something better together.” Matt Hill is passionate about fusing all his passions, effectively creating his own mashup masterpiece. In this course, Matt shows us how to combine long-exposure night photography, cut paper art and barely-clothed models to create an incredible project that he calls “Night Paper."
Skillfeed requires a subscription, but you can watch my video and anything else on Skillfeed during a 30 day trial. If you use this link, then Skillfeed knows that I sent you and it helps me greatly :-)
Thanks for checking me out. I hope you enjoy the video, and those from other ADC members and Young Guns.
Below is a gallery of images from the shoot. Not all made the video, so enjoy! Deepest thanks to my Production Manager Mabel, plus Gymnos Aliithea and Sincerely Yours for being both photographic and video stars. Also lots of thanks to Margina Dennis for handling our hair and makeup. You are a star, and we appreciate you.